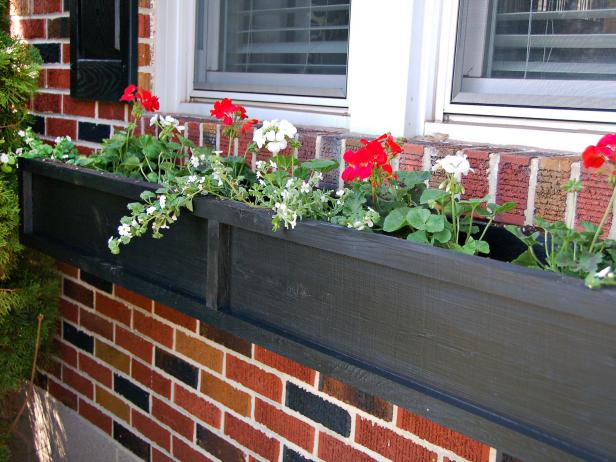
- Determine the length of each box by measuring the window sill from side to side and transfer the measurements to the 1×10. The width of the box should match its depth, so measure the 1×10 for its exact dimension (usually 9 1/2 inches).
- Using the miter saw, cut the 1×10 boards to length using the measurements from the previous step. Each box will require a front, back, and two sides, each with corners cut at 45 degrees.
- Apply a bit of two-part PVC glue to the mitered faces of each corner and assemble the box. Use the Brad nailer to hold the joints together while the PVC glue sets up.
- With the corners brad nails, predrill the face of the box at each mitered joint. Drive a 2 1/2-inch trim head screw through each hole to strengthen the structure of the box. Pro Tip: Be sure to drill where the trim will hide the holes for the best look.
- Measure the inside width and length of the box and cut a piece of 1×10 on the table saw to match. Glue, nail, predrill, and screw the bottom onto the box.
- Cut the base cap and band molding on the miter saw, making sure to cut 45-degree miters at each corner. Use the brad nailer to install the band across the top of the box and the base molding across the bottom. Top the box off with 1 3/4-inch wide board cut on the table saw, mitered at each corner.
- Use a 1/2-inch spade bit to drill weep holes every 6 to 8 inches for drainage.
- Mark the stud locations on the siding under the window. There will be studs underneath each corner of the window, as well as in the middle (check the siding for nail heads). Transfer these marks to the new window box and predrill holes using a 1/4-inch drill bit.
- Hold the box in place and use a pencil to mark the hole locations on the siding. Remove the box and predrill the holes before squeezing a dab of caulk into each hole.
- Hold the flower box back up and use the right-angle attachment to drive 4-inch structural screws from inside the box into the wall framing.
- Place landscape fabric inside the planter, fill it with an inch of lava stone, a bed of potting soil, and a mix of annuals and perennial plants.
RELATED
Window Planter Boxes: How to Create Beauty & Balance
Resources
Nathan used stock 1”x10” Azek and stock Azek band molding and base cap molding to build three identical window boxes. To cut the materials to size, Nathan used a sliding compound miter saw, which is manufactured by Dewalt. To secure the front, back, bottom, and side pieces together, Nathan used 2-part PVC glue, 1 1/4-inch brads, and 2 1/2-inch stainless steel trim head screws, which can all be found at home centers. He secured the molding with 2-part PVC glue and 1-inch brads. To allow for drainage, Nathan created drainage holes on the bottom of the window boxes. He used a 1/2-inch spade bit to drill holes every 8 inches along the centerline of the bottom piece of Azek.
Nathan mounted each window box directly to the house’s siding. He predrilled pilot holes, added caulk into each hole, then used 4-inch structural screws to secure the box to the clapboard through the predrilled holes.
Jenn lined the window boxes with one layer of landscape fabric, which can be found at garden and home centers. On top of the landscape fabric, she added handfuls of Volcanic Lava Rock to cover the drainage holes. Jenn used a combination of annuals and perennials to fill the window boxes, which get morning sun and afternoon shade. Plants and flowers used include Northern Maidenhair Ferns, Pearly White, Glacier Ivy, begonia, bush violet, and vinca, which she planted in Fox Farm Ocean Forest potting soil made by Fox Farm.
In addition to regular watering, Jenn suggests using a slow-release fertilizer like Osmocote–made by Scotts Company LLC. once every three months to help keep the window boxes healthy.
See more gardening supplies at The Home Depot
Materials
- 1×10 PVC stock
- PVC band molding
- PVC base cap
- PVC glue
- Trim head screws
- 4-inch structural screws

